Davis McGuirt, Lynchburg, VA
Moon Over Aijalon –
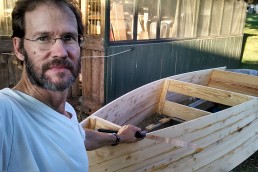
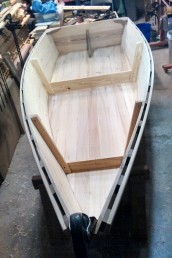
Dinghy built by Davis McGuirt 2017 – 10′ OAL/4.5′ beam – Leyland Cypress, pine, cypress, and black walnut
It all started with a dream to make something that would take me somewhere!
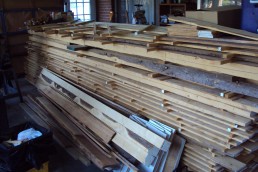
Everyone struggles to have the time to build, a place to build, and wood to build with. I received a real blessing from my brother John, who has a chain-saw mill, when he gave me a whole stack of Leyland cypress that he and his helper Elisha had processed (see Woodpile pic). You may recognize Leyland cypress as the fast-growing trees people plant along their driveways for borders and privacy fences. Though it is very knotty I have found it to be a great boat-building wood. It also made me feel good to be recycling trees that would have otherwise been discarded. He lives in SC so it is so fun to enter this boat into the show in SC even though I am in VA and built it there.
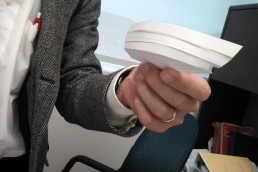
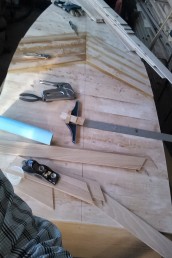
I did not use any plans, but I must say that I have subscribed to several boat magazines for many years and had been reading Sam Rabl’s Boatbuilding in Your Backyard. All those plans were floating around in my head for 20 years waiting to come out. The old timers call it building by “rack of eye.” I am a college professor, and one day while waiting for my students to finish a test I created a paper model to see if it the planks would bend that way (see paper model pic). Once I started building I simply let the wood take its own shape, and I had to encourage it only a little from time to time.
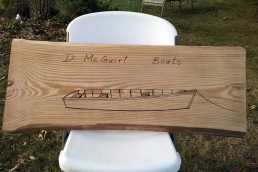
I re-drew a boat I liked from the Rabl book on a thick piece of yellow pine, and it became both my inspiration and eventually my shop sign.
Turning good wood into sawdust and noise
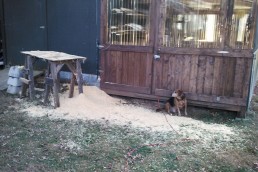
The next phase was, as some have described, turning good wood into sawdust and noise. Of course planing is often necessary for boat-building, and it was in my case. Look at the picture of the aftermath of planing some planks. Even my dog is looking at the table where I had my planer and wondering what just happened! I’m sure the neighbors were glad when things subsided.
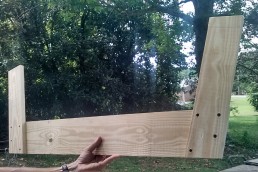
Not long after this I chose the stem wood. I decided to make a one-piece stem with rabbets for the planks on either side. Like many boat-builders I know the history of every piece of wood in my boat. I used a piece of heart pine (look how red it is!) given to me by my late father who was an engineer. Thank you Dad for inspiring me and instilling in me a desire to design and build beautiful functional things. May this stem part the waters into new seas and new relationships for many years to come.
It was around this time I screwed together the amidships frame (see pic) from Southern Yellow Pine that my friend Earl gave me.
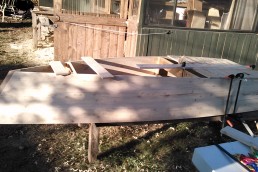
Like many boatbuilders I used my shop space to store my wood. This left me with no other options than building the boat outdoors. I made a strong back and set in place the transom (solid yellow pine, about ¾ inch thick), the frame, and the stem, and then I gently bent into shape the first planks (see pic). Many have described the moment when they can see a real boat take shape, and I would echo their statements that it is very encouraging. Something you have only dreamed about (in my case, for many years) is finally happening. It WAS like a dream coming true, I must say….
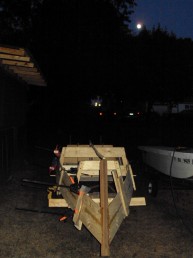
Those who have worked with epoxy know that once you have mixed a batch you want to work rapidly, and you don’t want to waste any. I edge-glued my planks one to another, and sometimes worked late into the evenings that summer. Yes, I occasionally worked by head-lamp and moonlight. Those of you from SC will like the nighttime photo of the moon in the sky over the boat, kind of like your state flag. The planks were going on and things got better and better. I named the boat Moon Over Aijalon, which comes from the Bible. It is where Joshua asks God for more time. I am going to need more time to build all the boats I have in mind!
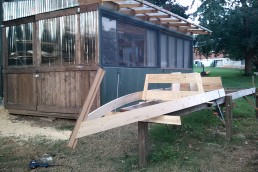
It is so fun to add planks to the sides of a boat! Progress is relatively rapid and the shape becomes nicer as you go. I had to taper the last several, and that is a challenge, whew!
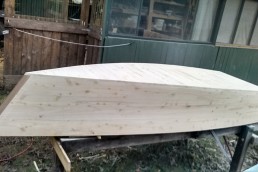
Finally the day arrives when you add the final plank. Look at me with my boat…so happy even though it has no bottom!
About 20 years ago I read that you ought to set a comfortable chair near your boat for times that you’d want to just sit there and think about the next step, or admire the way she looks. I was so glad the sides came out even!
I almost wore out a belt sander on this boat.
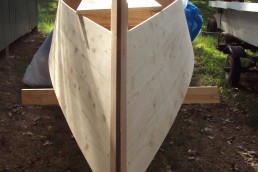

Bottoms up!
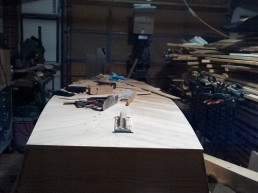
I decided to cross-plank the bottom. I did not know at this time that I would eventually add two more layers (of cold-molded veneers) to the inside and outside.
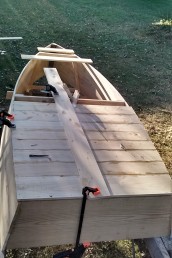
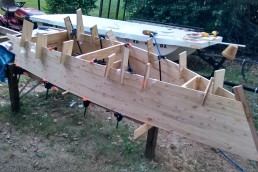
Some of the joinery and the first varnish…
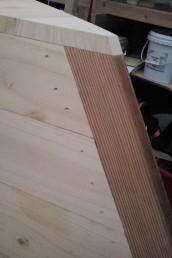
Stem meets sides and bottom

Joinery
First varnish
Transom meets sides

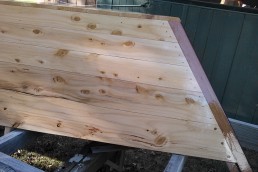
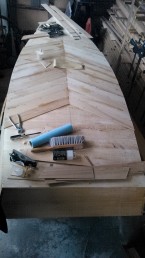
I put a layer inside and outside of the bottom of the boat, glued on by epoxy. I chose to make a herringbone pattern on the bottom, while using a more conventional pattern inside (90 degrees to the crossplanks). It took a long time but I got the whole floor covered!
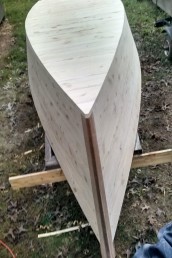
The veneering process
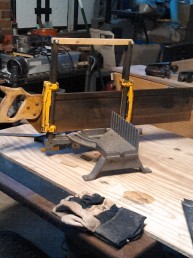
So I found a way to fit the boat inside my garage and began the veneering process. I had some pure cypress siding someone had given me and it became the material for the veneers. They were all about 1/8 inch thick and about 3 inches in width. I used an antique miter saw I had gotten from my grandfather to cut the pieces.

Gluing Veneers
Gluing veneers took me several months but I enjoyed it. To get the bottom ready I had to sand all the varnish off that I had put on their earlier! Oh well.
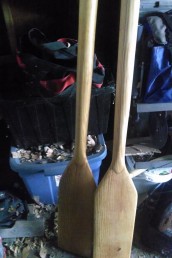
I enjoyed [the project] so much and HAVE started another boat. One day I will build a boat that I can spend the night on, and this little dinghy will get me to and from shore. I wish I could have brought her in person to the Georgetown Show. This is her first reveal to the world, and it was my privilege to do it through your show, as she IS from SC!
Blessings,
Davis
Lynchburg, VA